Integrate DocRaptor 
We’ll assume that you already know how to add tasks to a workflow and have added the DocRaptor task to your workflow.
Integrating DocRaptor with Kotive happens in three steps:
1. Connect your DocRaptor account:
Log into your DocRaptor account. If you don’t have a DocRaptor account yet and just want to test the integration out, then copy the following text: YOUR_API_KEY_HERE and skip to Step 3.
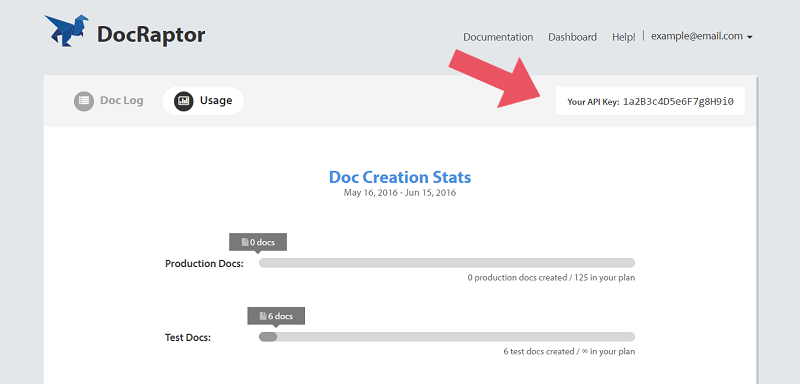
Copy your API Key from the top right-hand corner of the page.
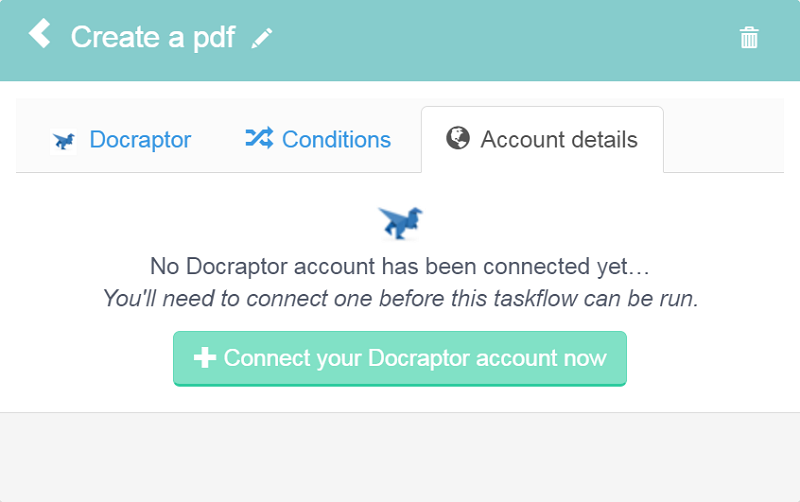
Next, head back to your workflow in Kotive, select the DocRaptor task and navigate to the Account details tab. Select the green button that says Connect your Docraptor account now.
Name the account under Account label - the email address that you use for your DocRaptor account would work well as a way to identify it.
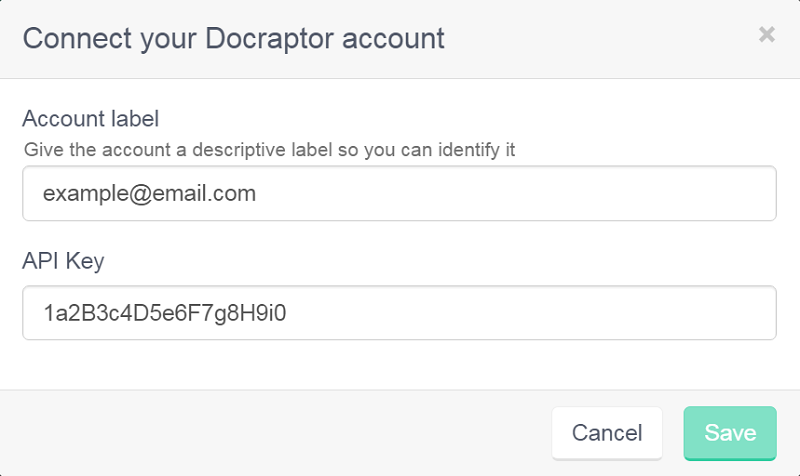
Paste your API Key in the API Key field (or, paste YOUR_API_KEY_HERE into the field if you’re only testing the integration), and click the green Save button in the bottom right-hand corner.
Your DocRaptor account has now been connected to your workflow.
2. Setup the DocRaptor task:
Select the Docraptor tab of the DocRaptor task.
If you want to create a spreadsheet instead of a .pdf, then select xls or xlsx.
Insert the content for your document in Document content. You can pull data from earlier in the workflow directly into the document using dynamic field tags. If you’re not sure how to create an attractive-looking .pdf document using html, consider using one of these templates and adapting them to suit your needs better.

Enter a Filename - you can also customize the file name using dynamic field tags. It’s a good idea to end your filename with the file-type extension (.pdf; .xls or .xlsx).
If you’ve used YOUR_API_KEY_HERE, then under Test, select yes.
Enter a tag for your document (e.g. Quote, Invoice, etc).
Your DocRaptor file has now been set up, but stopping here would mean that the file would sit in DocRaptor without being seen by anybody.
This is why it’s vital to complete the final step.
3. Send a link of the rendered file:
After your DocRaptor task, create an email task or other communication task.
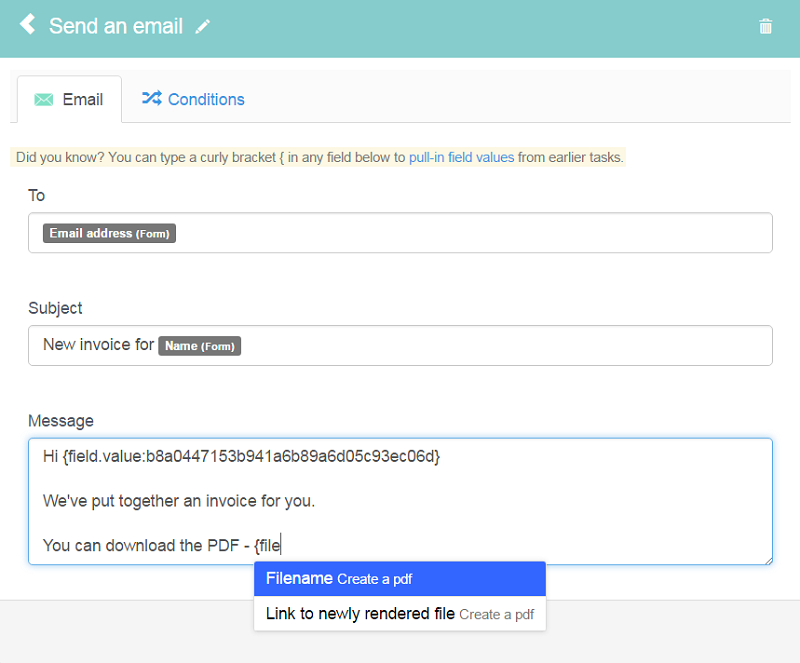
Type in ‘{file’ in the message that will be sent in this task.
- Select Filename … for the Filename which you assigned in the DocRaptor task.
- Select Link to newly rendered file … to generate the link to download the file.
Here’s an example of what the download link’s html could look like:
<a href="{service.file_uri:12948}>Download {field.value:8765}</a>(You can copy this code - just edit the dynamic field tags to fit in with your workflow.)
Done! You have now fully integrated your DocRaptor account with your Kotive workflow. When a workflow runs, a beautiful, high-quality document will automatically be rendered and sent to whomever you choose.
