Icon for Claim expenses workflow solution

Claim expenses

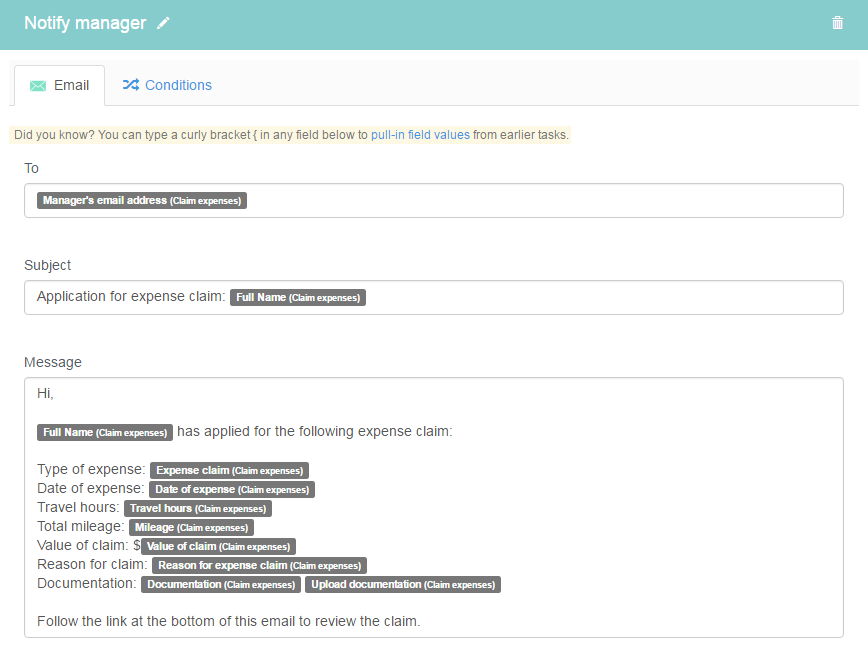
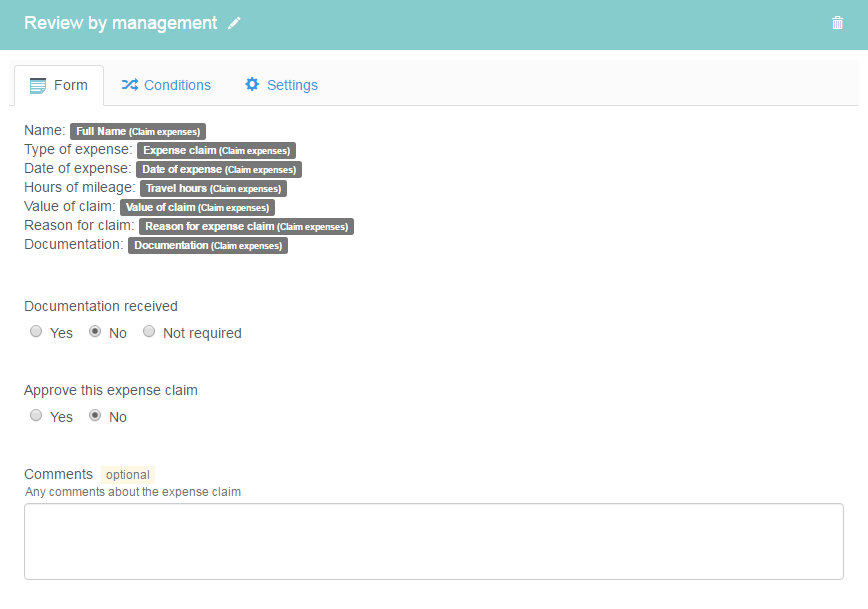
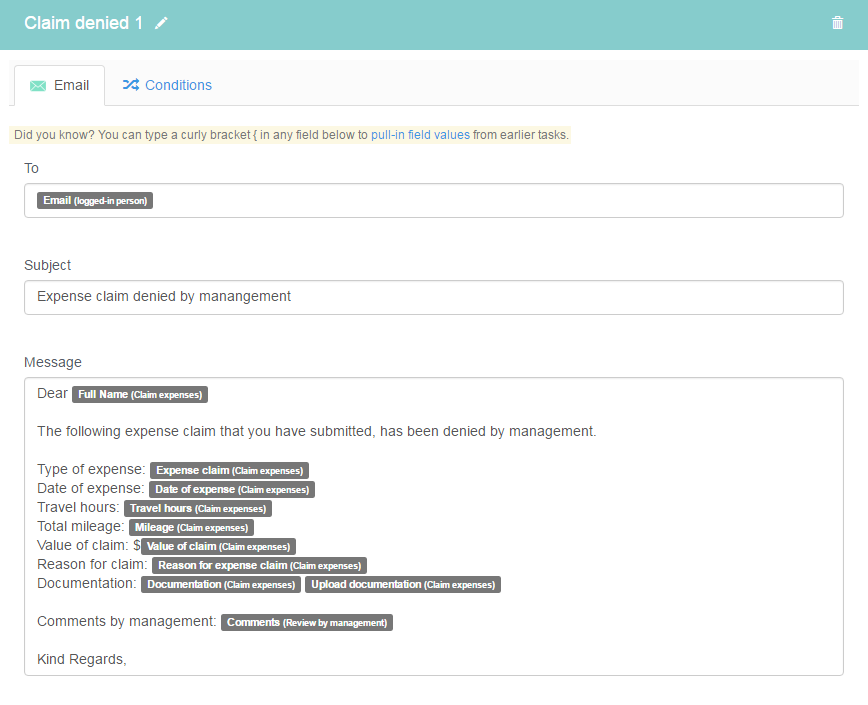
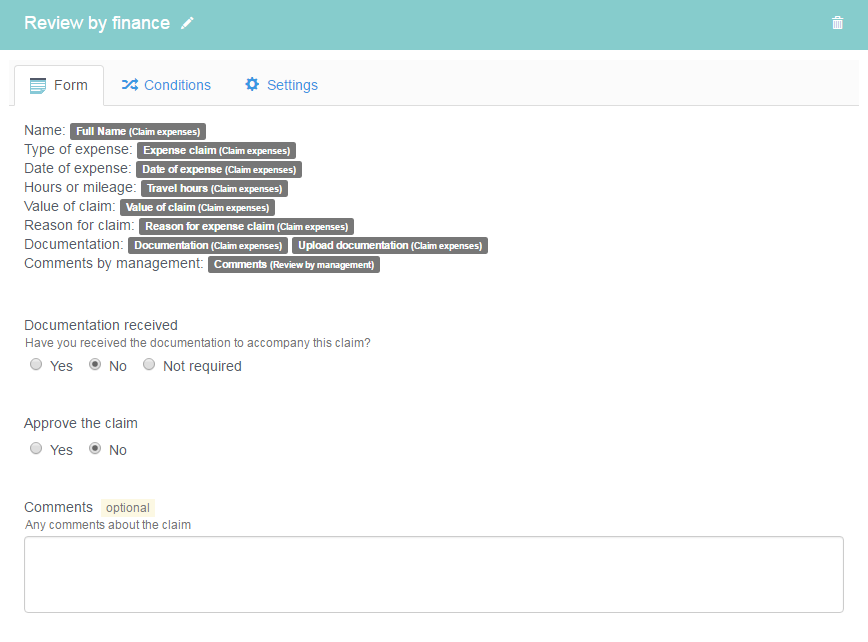
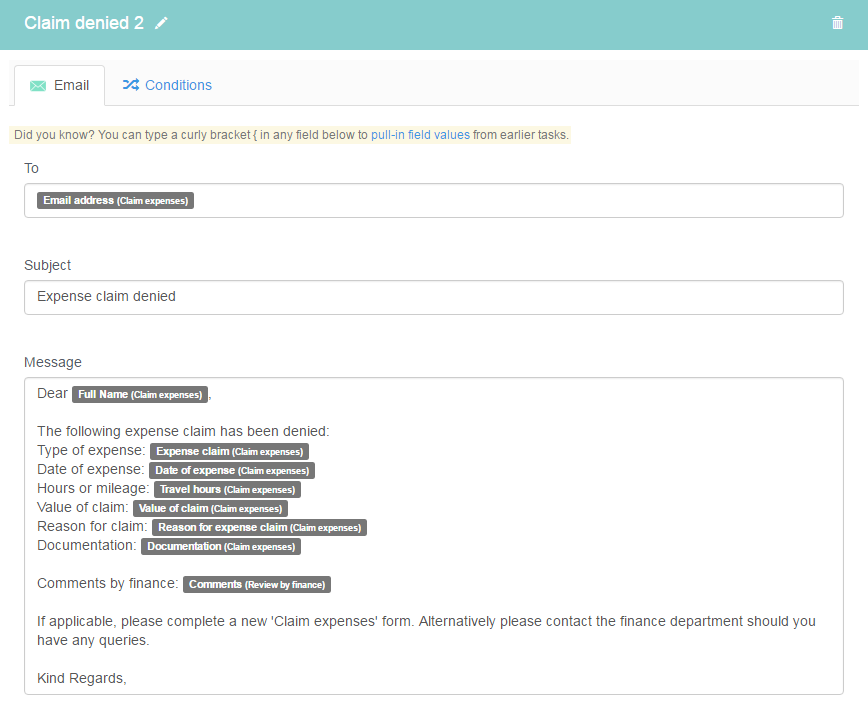
The 'Claim expenses' workflow manages all employees' submissions and review of expense claims as they're incurred, avoiding a month-end rush.

A step-by-step guide to Claim expenses

This guide will explain the 'Claim expenses' workflow step by step.
It makes use of numerous screenshots, but if you'd like to follow along in the Kotive webapp, you can sign up and copy the workflow into your account for free.
Keep the workflow open in a separate tab in your browser, and interact with it while reading the steps in this guide.

Section 1: Submitting a claim

In this section, an employee submits their expense claim, and the manager reviews the claim.

Claim expenses

The first part of this form is a paragraph that's titled: !!! IMPORTANT CHANGES you need to make BEFORE running this workflow: This paragraph contains instructions on how to personalize the workflow for you and your company. If you intend to run the workflow, these changes can not be ignored.

Next you'll notice that there are two faded out fields. These are called 'hidden fields'. These fields capture information without displaying them to the user and make their information available to other tasks in the workflow.

The workflow starts when a logged-in employee fills this form in with the details of their expense claim.
Claim expenses

Notify manager

The manager receives an email containing the details of the employee's expense claim. Kotive creates the content of the email by pulling in the details from the previous form.

Let's start by looking at how the email is typed up. There are lots of normal looking text words, but there are also lots of rectangular, shaded in, blocks of text. What's the difference?

Well, the normal text is just that: normal text. There's nothing special about it. But the blocks of text are actually information that is being pulled in from earlier forms. If you click on the text area of the email while in the webapp, you'll see that it changes and suddenly looks like a lot of code with lots of curly brackets { } and numbers. This code (also called dynamic field tags) is what tells these fields of text what they're going to end up saying. When this email gets sent to the manager, it won't look like it does now, it will all be normal text, because the workflow will look at the previous forms and put the information from those forms into this email.
Notify manager

Review by management

This form task has one condition:

Activate this task when...
'Role' IS 'Manager'

This form can only be viewed and completed by a manager.

The manager reviews the employee's expense claim and decides whether or not to approve the claim.
Review by management


Section 2: Notification emails

The employee and the finance department are notified of the manager's decision.

Claim denied 1

This email task has one condition:

Activate this task when...
'Approve this expense claim' IS 'No'

This email will only be sent if the manager denied the expense claim in the previous form task.

The employee is informed that their expense claim has been denied, and of the manager's comments. If the manager denied the claim in the previous form, then the workflow is finished as soon as this email is sent.
Claim denied 1

Claim approved 1

This email task has one condition:

Activate this task when...
'Approve this expense claim' IS 'Yes'

This email will only be sent if the manager approved the expense claim in the 'Review by management' form task.

The employee is informed that their expense claim has been approved by management, and is up for final review.
Claim approved 1

Notify finance

This email task has the same condition as the previous email:

Activate this task when...
'Approve this expense claim' IS 'Yes'

This email will only be sent if the manager approved the expense claim in the 'Review by management' form task.

Finance is notified about the expense claim, and is instructed to review the claim in the next task.
Notify finance


Section 3: Final review

In this section, the finance department reviews the expense claim, and the employee is notified of their decision.

Review by finance

This form task has two conditions:

Activate this task when...
'Role' IS 'Financial Department'
AND
'Approve this expense claim' IS 'Yes'

This form can only be viewed by the finance department, IF the manager approved the claim in the 'Review by management' form.

The finance department reviews the employee's claim and decides whether or not to approve it.
Review by finance

Claim denied 2

This email task has one condition:

Activate this task when...
'Approve the claim' IS 'No'

This email will only be sent if the finance department denied the expense claim in the previous form task.

The employee is informed that their expense claim has been denied and of the finance department's comments.
Claim denied 2

Claim approved 2

This email task has one condition:

Activate this task when...
'Approve the claim' IS 'Yes'

This email will only be sent if the finance department approved the expense claim in the 'Review by finance' form task.

The employee is informed that their expense claim has been approved.
Claim approved 2

After the 'Claim denied 2' OR the 'Claim approved 2' email has been sent, the 'Claim expenses' workflow is complete.
Get started now and clone this workflow directly into your Kotive account for free.

The Claim expenses workflow is automatically copied into your account when you select it. Want to make one or two changes to fit your situation better? No problem!