Create a basic workflow
Before you start creating workflows with Kotive, we recommend that you first design your workflow on paper. For more guidance read “The Field Guide to Agile Workflow Design”.
Click on the “Designer” in the main menu.

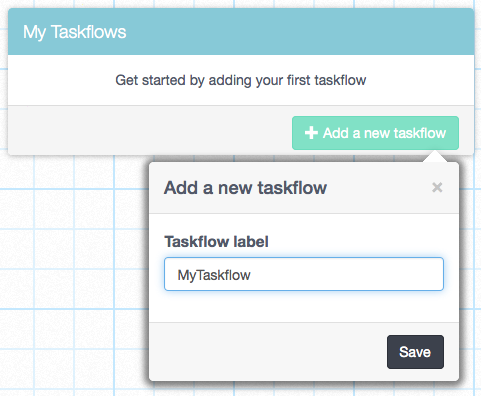
Click the “Add a new workflow” button. Enter a workflow label and save.
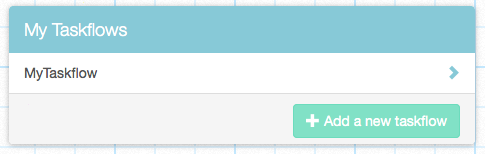
Click on your newly created workflow which is now available in your list of workflows.
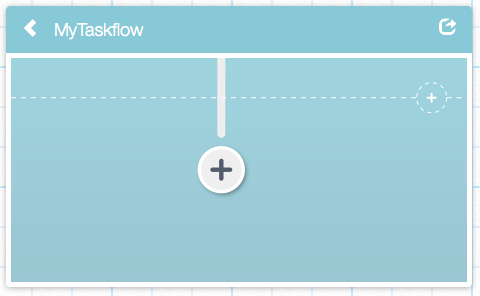
Add the first task by clicking on the “+” button.
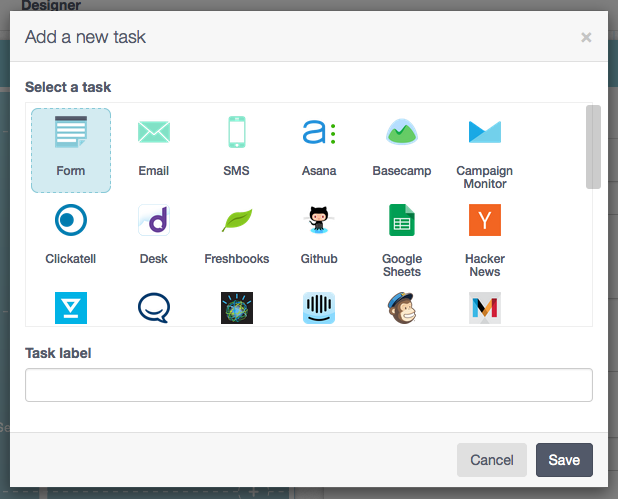
You’ll see a grid of available tasks. For now, select the first one: “Form”, give it a label and save. (E.g. we will label our task “Request to purchase”)
Your newly added “form” task is now visible within your workflow. The panel on the right is where you will add fields to the form.
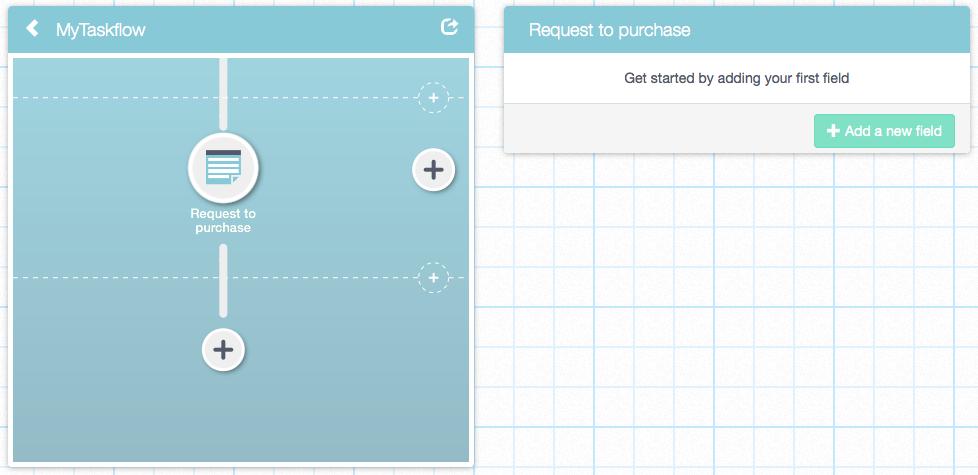
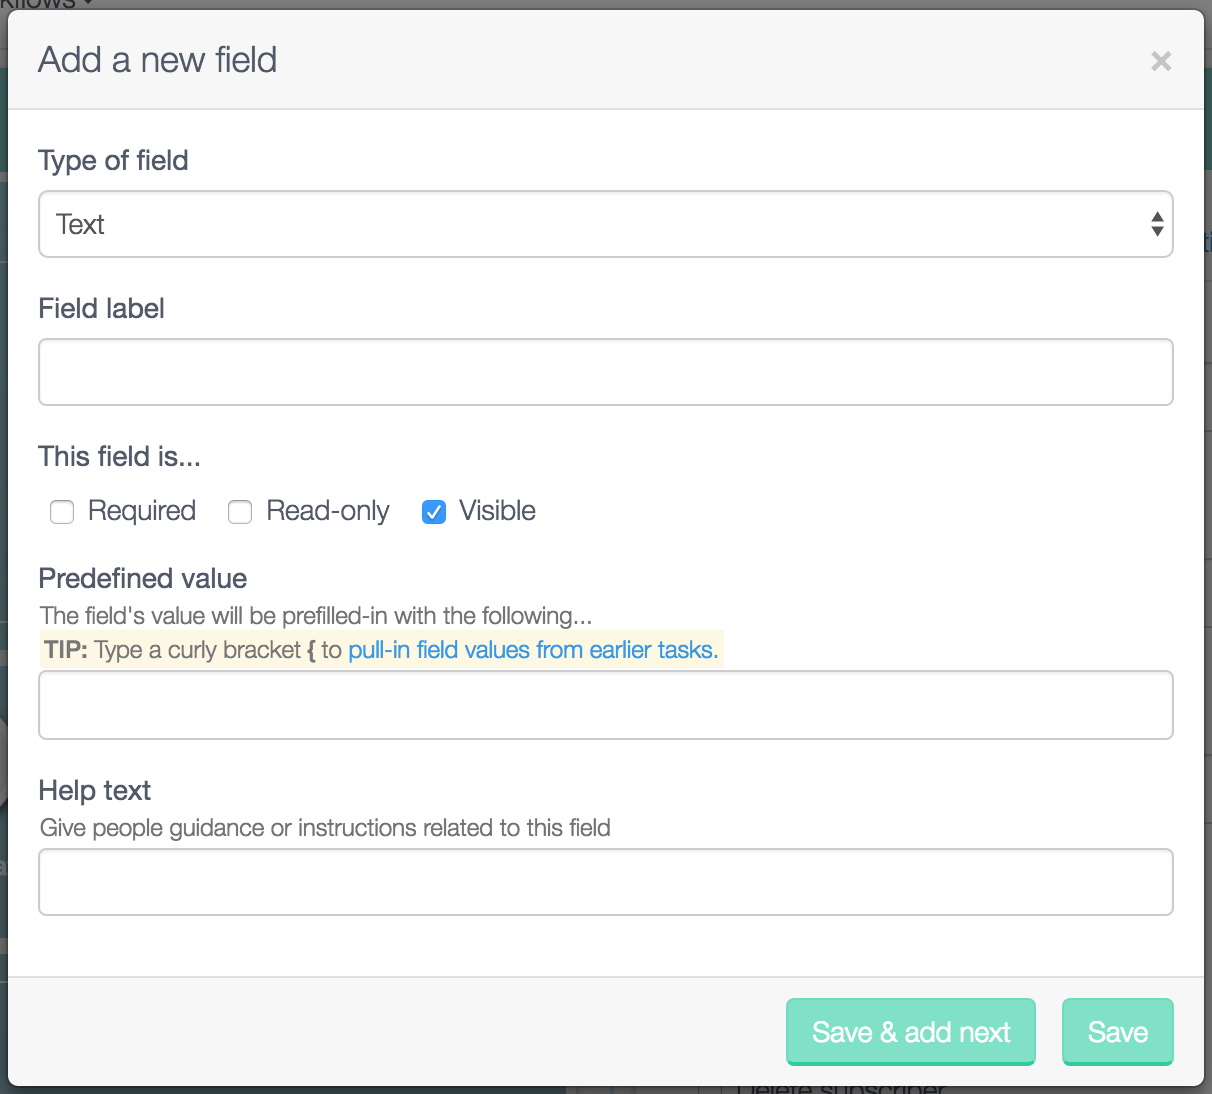
Click the “Add a new field” button. Give the field a label. Select what type of field it is. Tick if this is a required field. Fill in any help text that will assist the end-user when filling-in your form. Learn more about the different types of fields in Kotive.
Tips when adding fields
Clicking the “Save & add next” button is ideal when you want to add more fields to your form. Clicking the “Save” button will close the popup.
Add another couple of fields on your own.
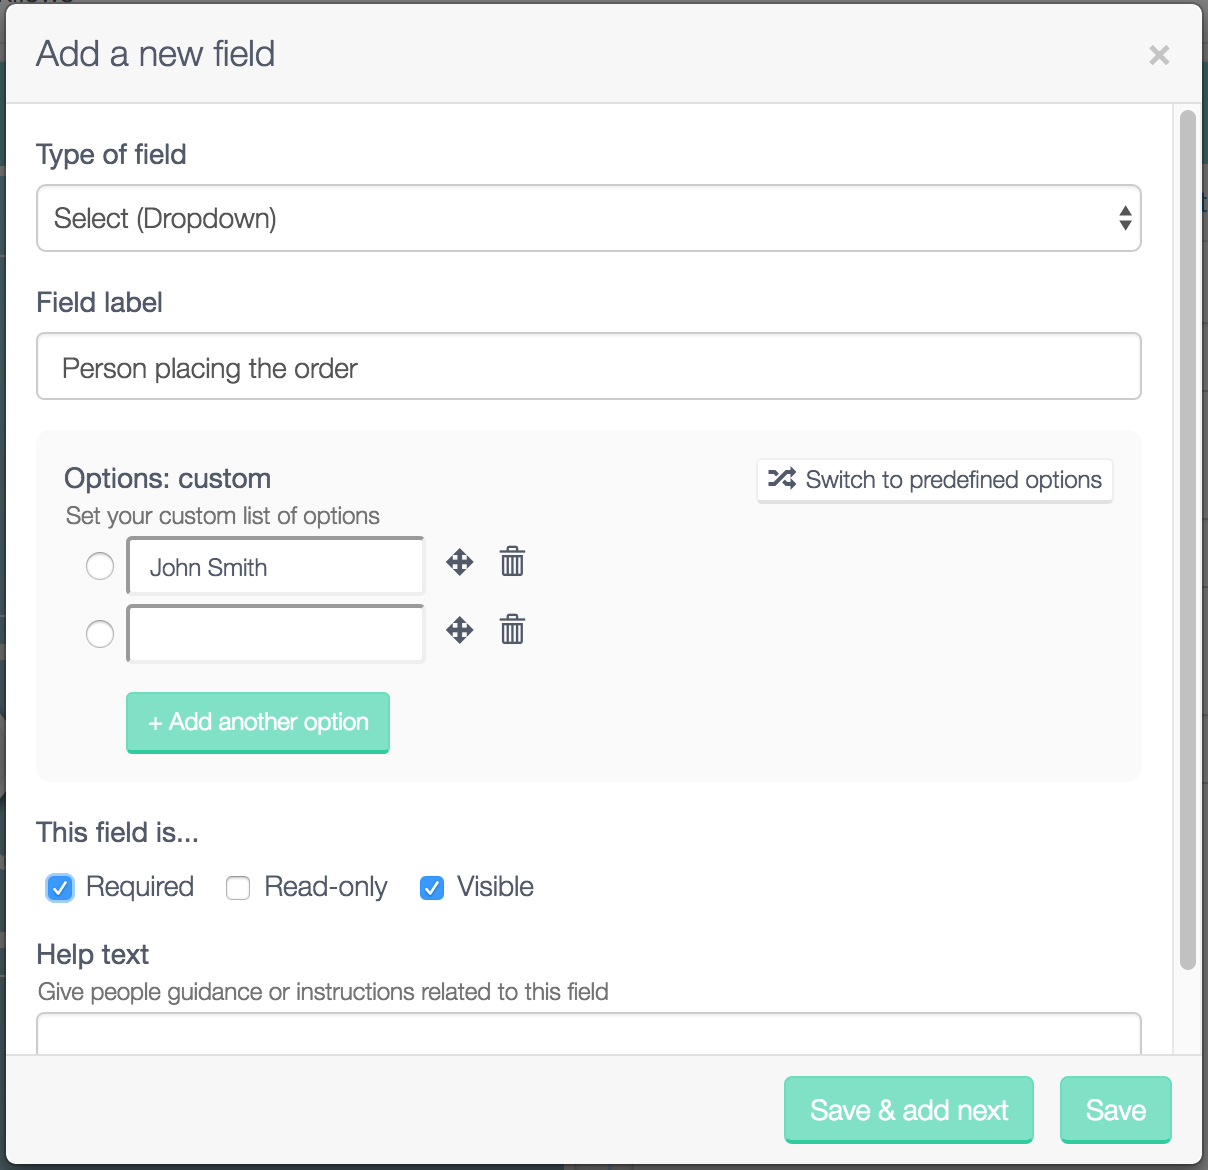
Play with the options available under “This field is…”:
- if “Read-only” is ticked then the end-user cannot enter or change any information in the field.
- if “Visible” is NOT ticked then the field will be invisible to the end-user.
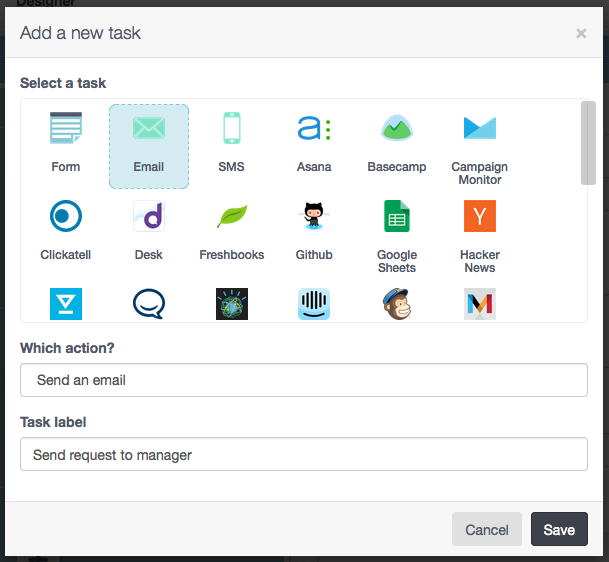
Add a second task to your workflow by clicking on the “+” button underneath your form.
Select an “Email”, leave the default action as “Send an email”, give the task a label and save.
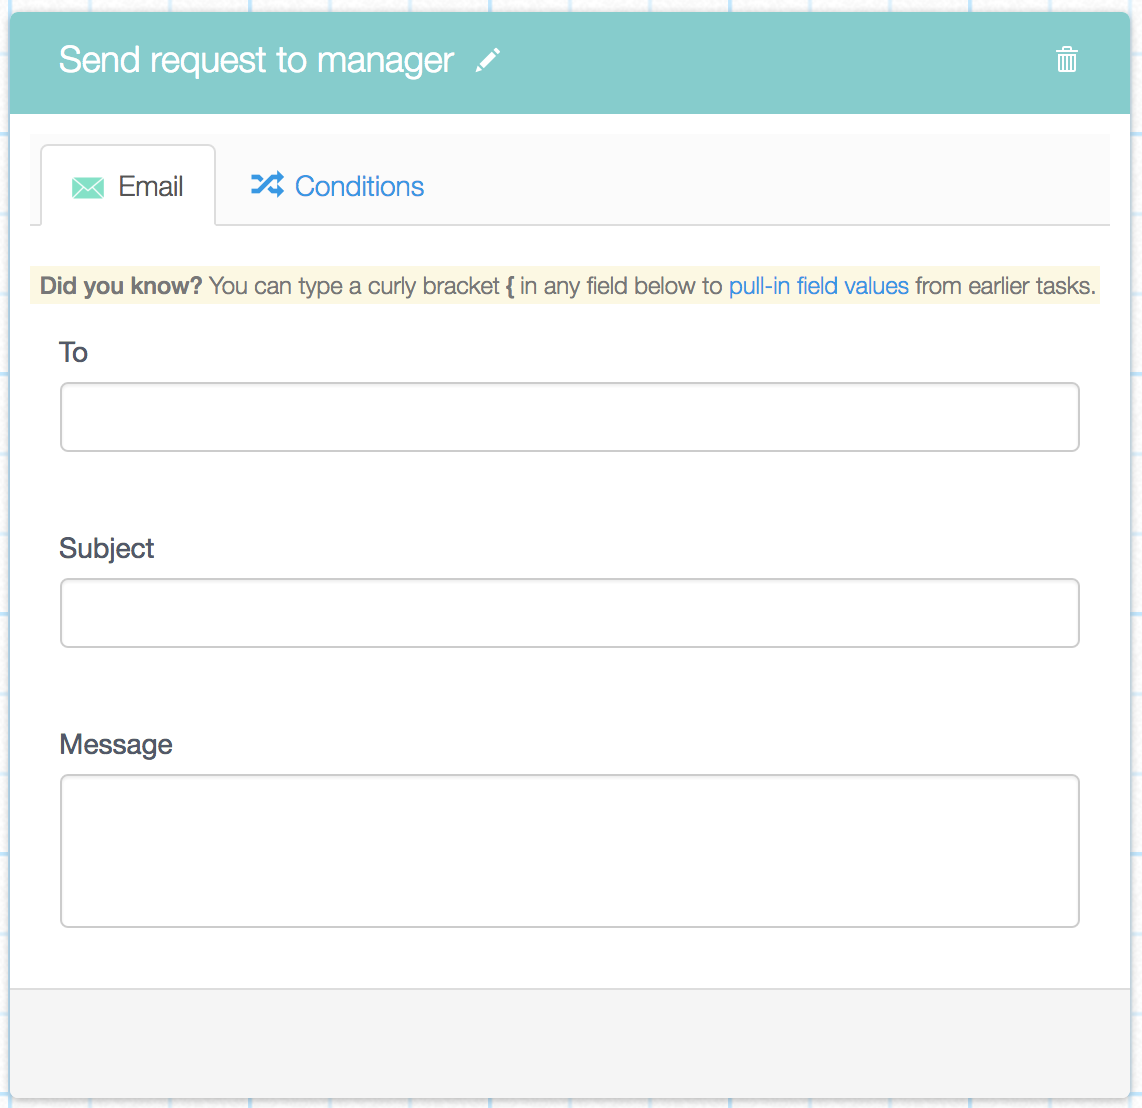
In the right-hand panel, fill in the recipient’s email address in the “To” field, enter a “Subject” and a short “Message”. Save.
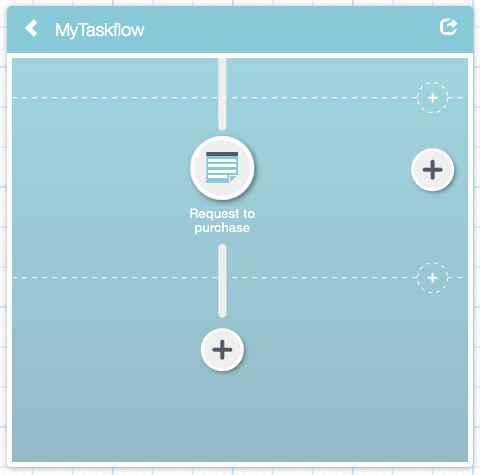
Your workflow now consists of your form and your email tasks.
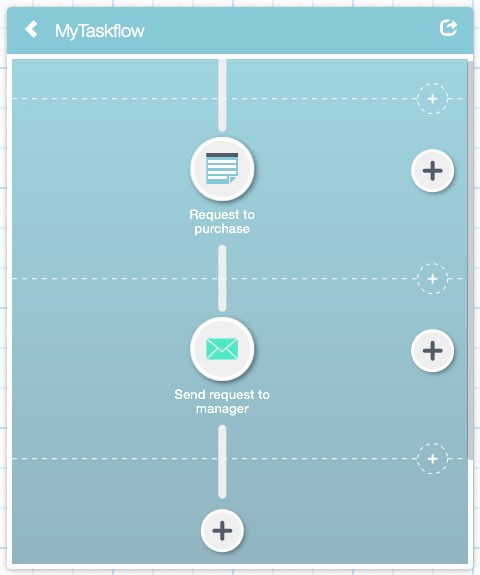
Congratulations! You’ve created your first workflow! The end-user will see your form and after submitting it (and if all the required fields have been completed) the email will be sent and the workflow will be complete.
