Integrate Mandrill 
We’ll assume that you already know how to add tasks to a workflow and have added the Mandrill task to your workflow.
Integrating Mandrill with Kotive happens in two steps:
1. Connect your Mandrill account:
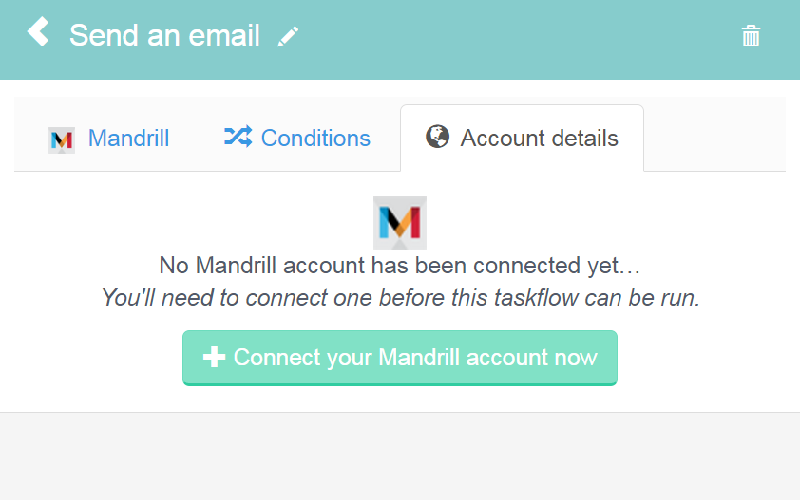
In your workflow in Kotive, select the Mandrill task and navigate to the Account details tab.
Select the green button that says Connect your Mandrill account now.
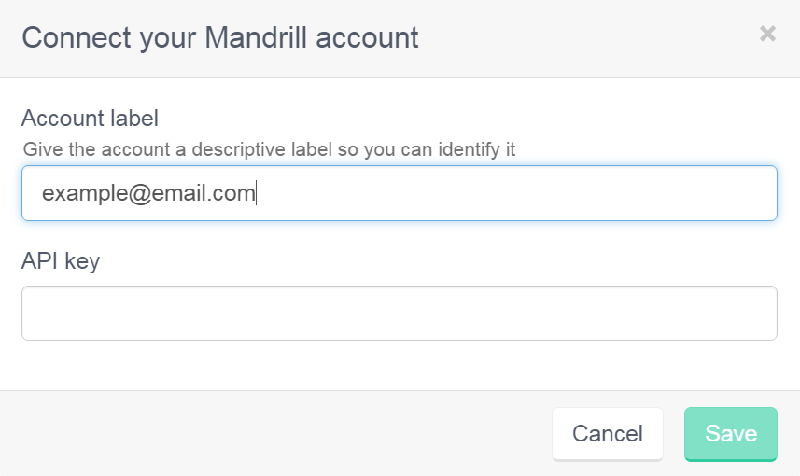
Name the account under Account label - the email address that you use for your Mailchimp account would work well as a way to identify it.
In a new tab, log into your Mailchimp account.
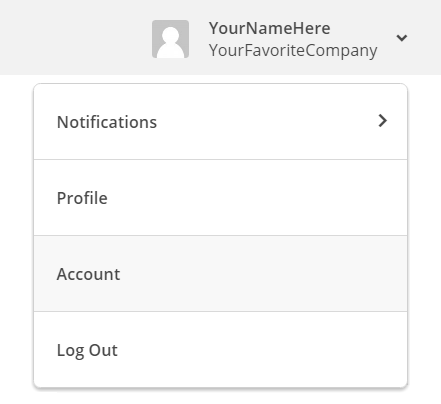
Click your profile name to expand the Account Panel, and choose Account.
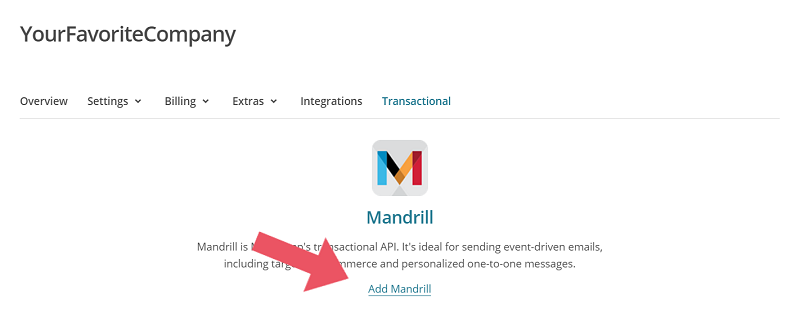
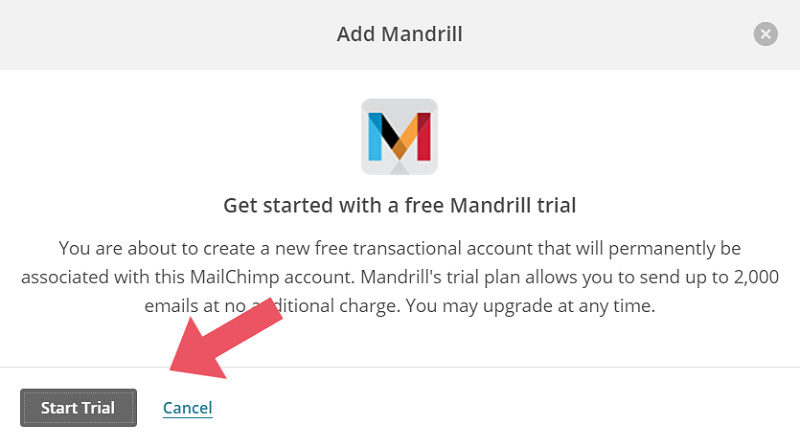
Click the Transactional menu item and click Add Mandrill.
Click Start Trial.
Click on Launch Mandrill.

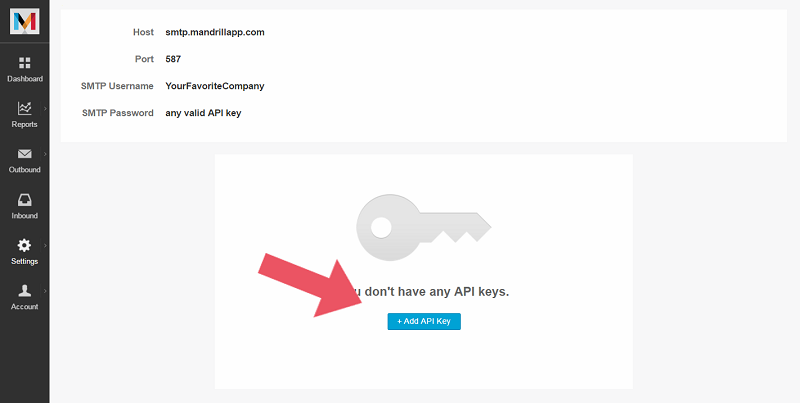
Click on + Add API Key.
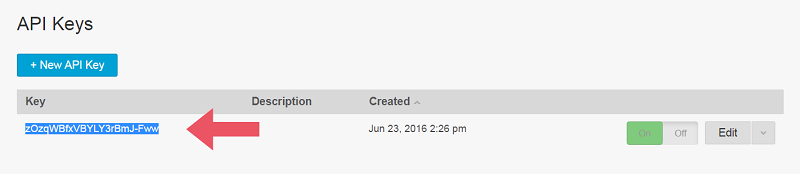
Copy the API key.
Next, head back to your Kotive tab, and paste the API Key in the API key field.
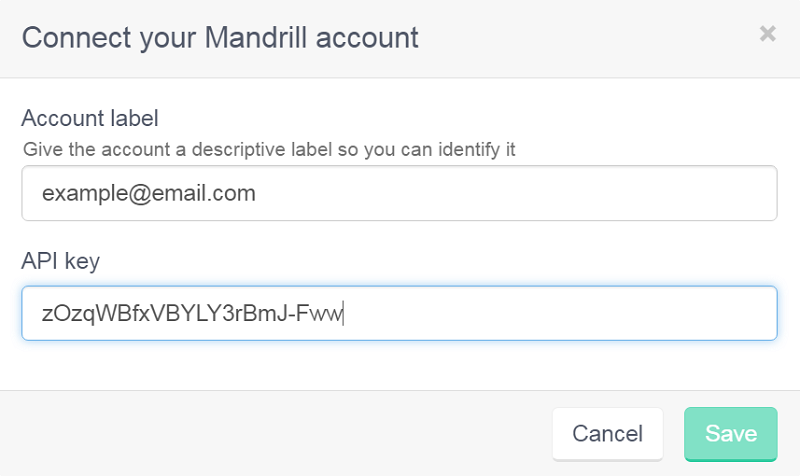
Click the green Save button in the bottom right-hand corner.
Your Mandrill account has now been connected to your workflow.
2. Setup the Mandrill task:
Navigate to the Mandrill tab of the Mandrill task.
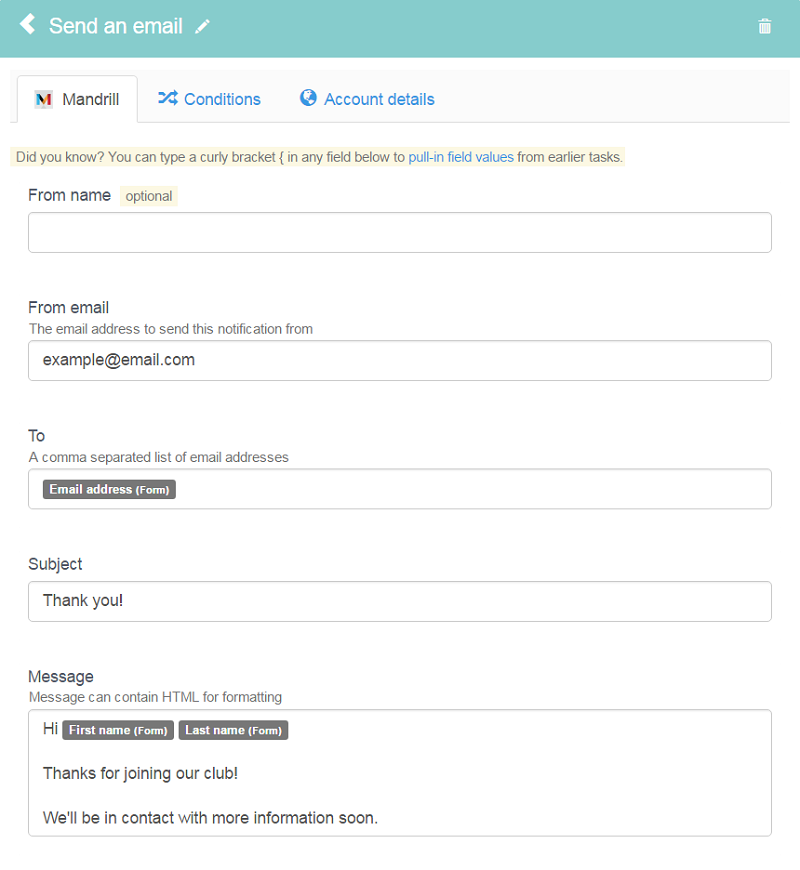
Pull information into the required fields using dynamic field tags. If you want to, fill in the optional From name field.
Done! You have now fully integrated your Mandrill account with your Kotive workflow. When a workflow runs, a personalized, transactional email will automatically be sent.
